
Connections and connectors work in concert to integrate JDE with other data sources. A typical standalone Orchestration acts as a REST API that can be called by any source and is meant to simply receive data. However, with Connectors and Connections, we can retrieve data from and send data to 3rd party sources.
- A Connection defines which information source you are connecting with.
- The Connector defines what specific data you are passing back and forth.
Types of Connection Sources
There are 6 types of connections you can create in Orchestrator. The initial three are the most commonly used.
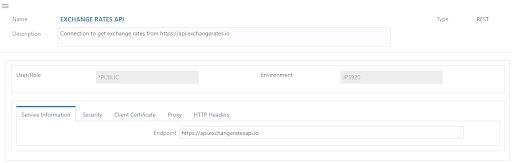
The first is a REST connection which is defined using a URI (Uniform Resource Identifier). A URI looks similar to a URL and serves the same purpose in pointing to a specific information source on the web. The second is a database connection. For this, you would input the connection string (IP, server name, username/password, and driver). The third most commonly used connection is used to connect to FTP servers using the hostname and port (along with username and password). You can use this same connection type for SFTP.
The other connection types are:
- Open API (a simple web app communication protocol
- Orchestration (for creating a connection to another JDE server and calling orchestrations from there)
- Enterprise Server A/S (which allows you to call services on the JDEdwards Enterprise server)
These last three types are really all REST connections presented in a convenient way.
As an example of building a REST connection, you could create one that uses an exchange rates connection as the information source by defining the URI. We will explore this below.
Building a REST Connector
Now that you have the Connection in place, you can create the Connector that shows how you are going to call it and what information you will receive.
- Select the Connection you will be using and choose the type of request. Get (read), Post (add/create), and Put (update) are the most common choices.


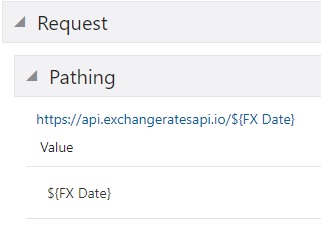
- Next, define the Path (the remainder of the URI that is after the first slash and before a question mark). This value can be input as a parameter or you can type in a static path.
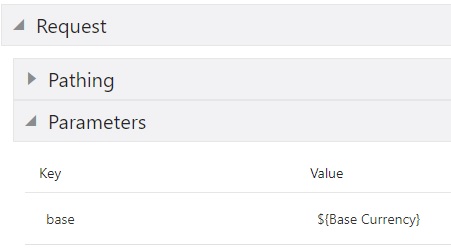
- Fill out the Parameters fields. For example, finding the desired base currency and its value (as a parameter or hard coded).
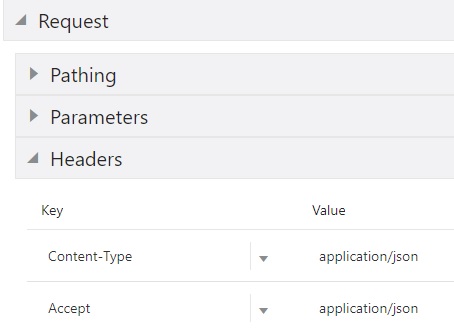
- Use the Header for standard options like sending authorization with a username/password or access key. Or, define the format for passing data being sent and received (JSON, XML, plain text, HTML, etc.). This field can also be used to send custom API-specific headers.
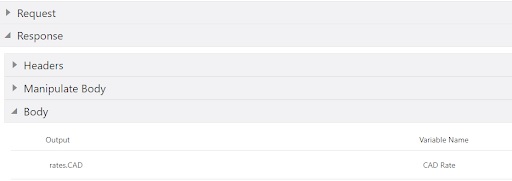
- Complete the Response field to define what you want to extract from the results. This output for exchange rates might be Rates.CAD. You want to define this narrowly enough to only get back the data you want rather than all potential currencies.
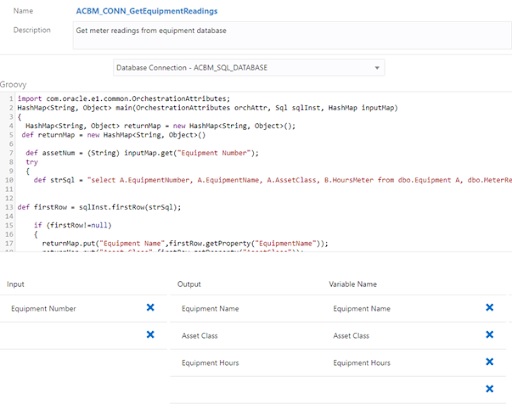
Creating a Database Connector
For this type of Connector, define the connection to the database and then write a Groovy script to create and execute SQL against that database. Whatever results you get back, you can pass to a future step just like with files via FTP or data from a REST connector. You can also run update statements on 3rd party databases by executing regular SQL through a Groovy script.
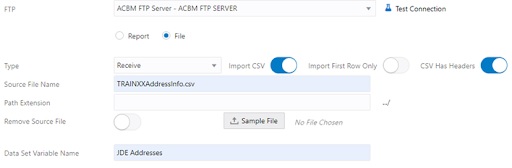
Working with FTP Connectors
For an FTP connector, you have several options for working with reports and files. When you run a report in JDE, you can take it and pass in the job number and execution server. The report will be sent to the FTP server and stored there in your preferred format (pdf, csv, bip). You could also send any type of file you want using a similar process to push the file to the server using the Send option under Type.
If you want to get data, you can use the Receive option instead. There might be a CSV file on the FTP server with information you need. By using the Receive type, you can pull in all the data from the file, and pass it into a future step to iterate over. For example, you might retrieve a file from a bank, read all the transactions and automate the reconciliation. Of course for this retrieval to work, someone has to create the CSV file, upload it to the FTP server, and make it available from there. This means it’s best used when these files are being routinely uploaded automatically.
Common Question: Users often ask, “What if we have prod/dev/test environments? How do we set these connectors and connections up for the correct environment?” The answer is simple. JDE has set the connections up as soft-coding records. This allows JDE to know what environment you are in and always use the right connection information.
Next up, we’ll be taking a quick look at Watchlists.

